🪩
How do I configure ShareX?
Learn how to configure Horizon as your ShareX provider on Windows.
ShareX is a popular open-source screenshot management utility for Microsoft Windows. This tutorial will show you how to setup ShareX with Horizon and auto-upload.
Prerequisites
- Windows 7 and later
- Recommended 5 GB of storage for historical local storage.
Installing ShareX
ShareX is available at https://getsharex.com. Click the "Download" button to download the latest version.
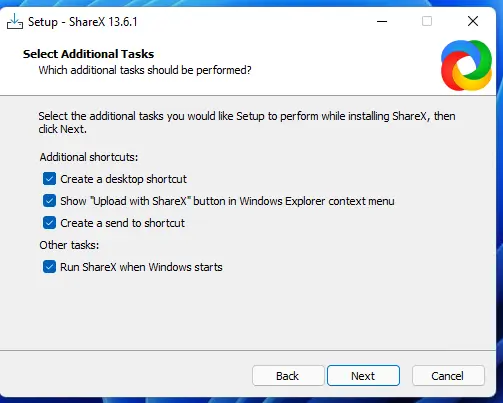
In the installer, it is recommended to leave all settings under "Select Additional Tasks" enabled.
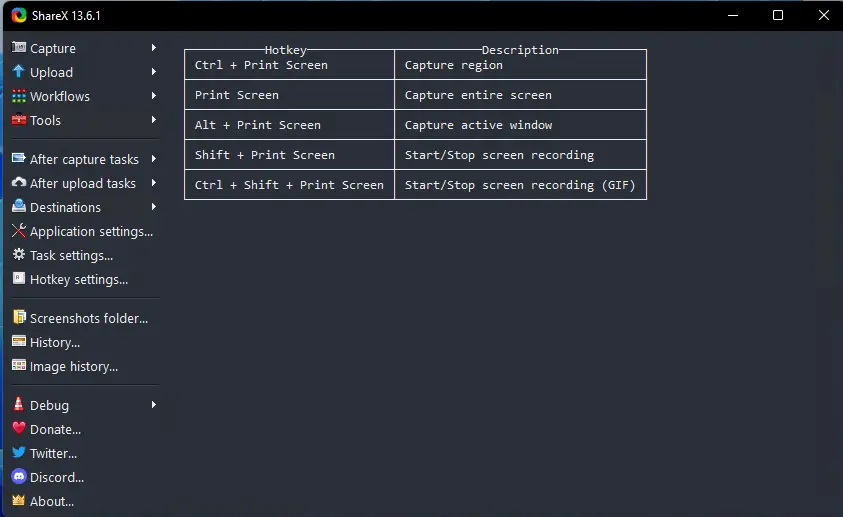
Once installation is complete, you will be greeted with a window displaying keyboard shortcuts.
Configure Horizon as Destination
- Navigate to the "Settings" page in the dashboard navigation bar.
- Scroll down to "App Configuration".
- Select "ShareX" in the dropdown menu.
- Click "Download Configuration".
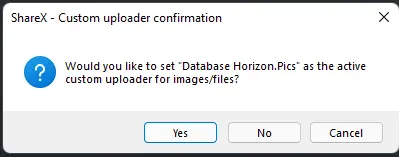
- Open the downloaded file.
- Click "Yes" in the shown dialog.
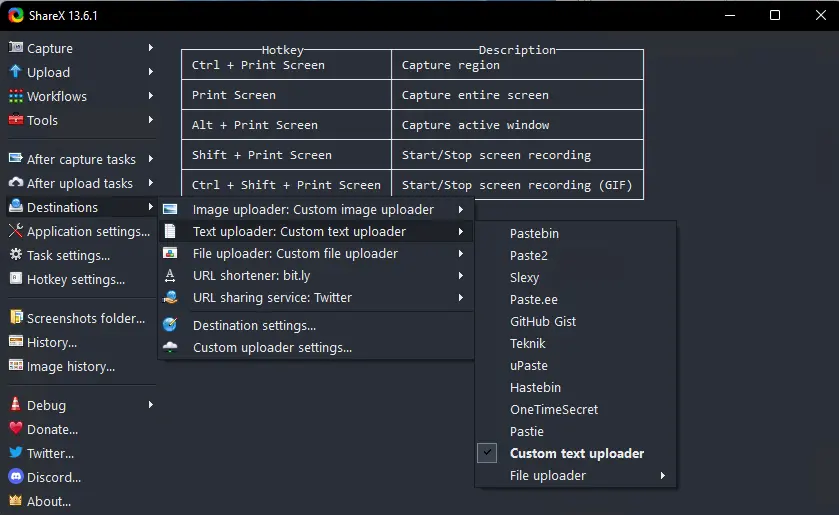
- In the ShareX main screen, click Destinations, and make sure all fields are set to "Custom uploader".
Horizon provides two different types of configuration files for ShareX. One allows file uploading, while the other enables link and paste creation.
Make sure to keep these configuration files private. Do not share them or you may compromise your account security.
The file should end in .sxcu.
Start uploading and sharing
Simply take a screenshot or drag/drop any file into ShareX, and it will be automatically uploaded to Horizon. ShareX will place a preview in the lower right hand corner and the link will be copied to your clipboard. Clicking on that notification will open your browser to the file.

