Using Horizon Alpine for Desktop
Set up convenient capturing and clipboard sharing.
Prerequisites
To start using Horizon Alpine for Desktop, you need to have an account. If you don't have one yet, you can sign up.
Horizon Alpine for Desktop is a tool designed to make capturing and sharing screenshots and clipboard content straightforward and efficient. You can select the exact region of your screen to capture using a keyboard shortcut, and the screenshot will be instantly uploaded to Horizon, with a shareable link copied to your clipboard. Horizon Alpine also allows you to upload your clipboard to a shareable pastebin link with a single click.
Downloading Horizon Alpine for Desktop
- Navigate to the download page.
- Select the download option that corresponds to your operating system.
- Run the program.
Currently, only macOS and Linux are supported.
On macOS, open the DMG and drag the application to your Applications folder. On Linux, simply
run the AppImage file from your file manager or the terminal. You may need to mark it as
executable first using chmod +x ./download.
Linux Note: Depending on your operating system and configuration, you may need to explicitly run Horizon Alpine for Desktop with the X11 window backend, as some Wayland configurations may inhibit its functionality.
Signing In
- Click the "Sign in" button at the center of the app window.
- If not logged in already, do so in the new browser popup. Otherwise, skip to the next step.
- Approve or reject the authentication request in the popup.
- Once approved, return to the app.
Taking Screen Captures
By default, Horizon Alpine for Desktop's keyboard shortcut is Ctrl/CMD + Shift + 0.
- After granting the application screen capturing permission, try invoking the keyboard shortcut.
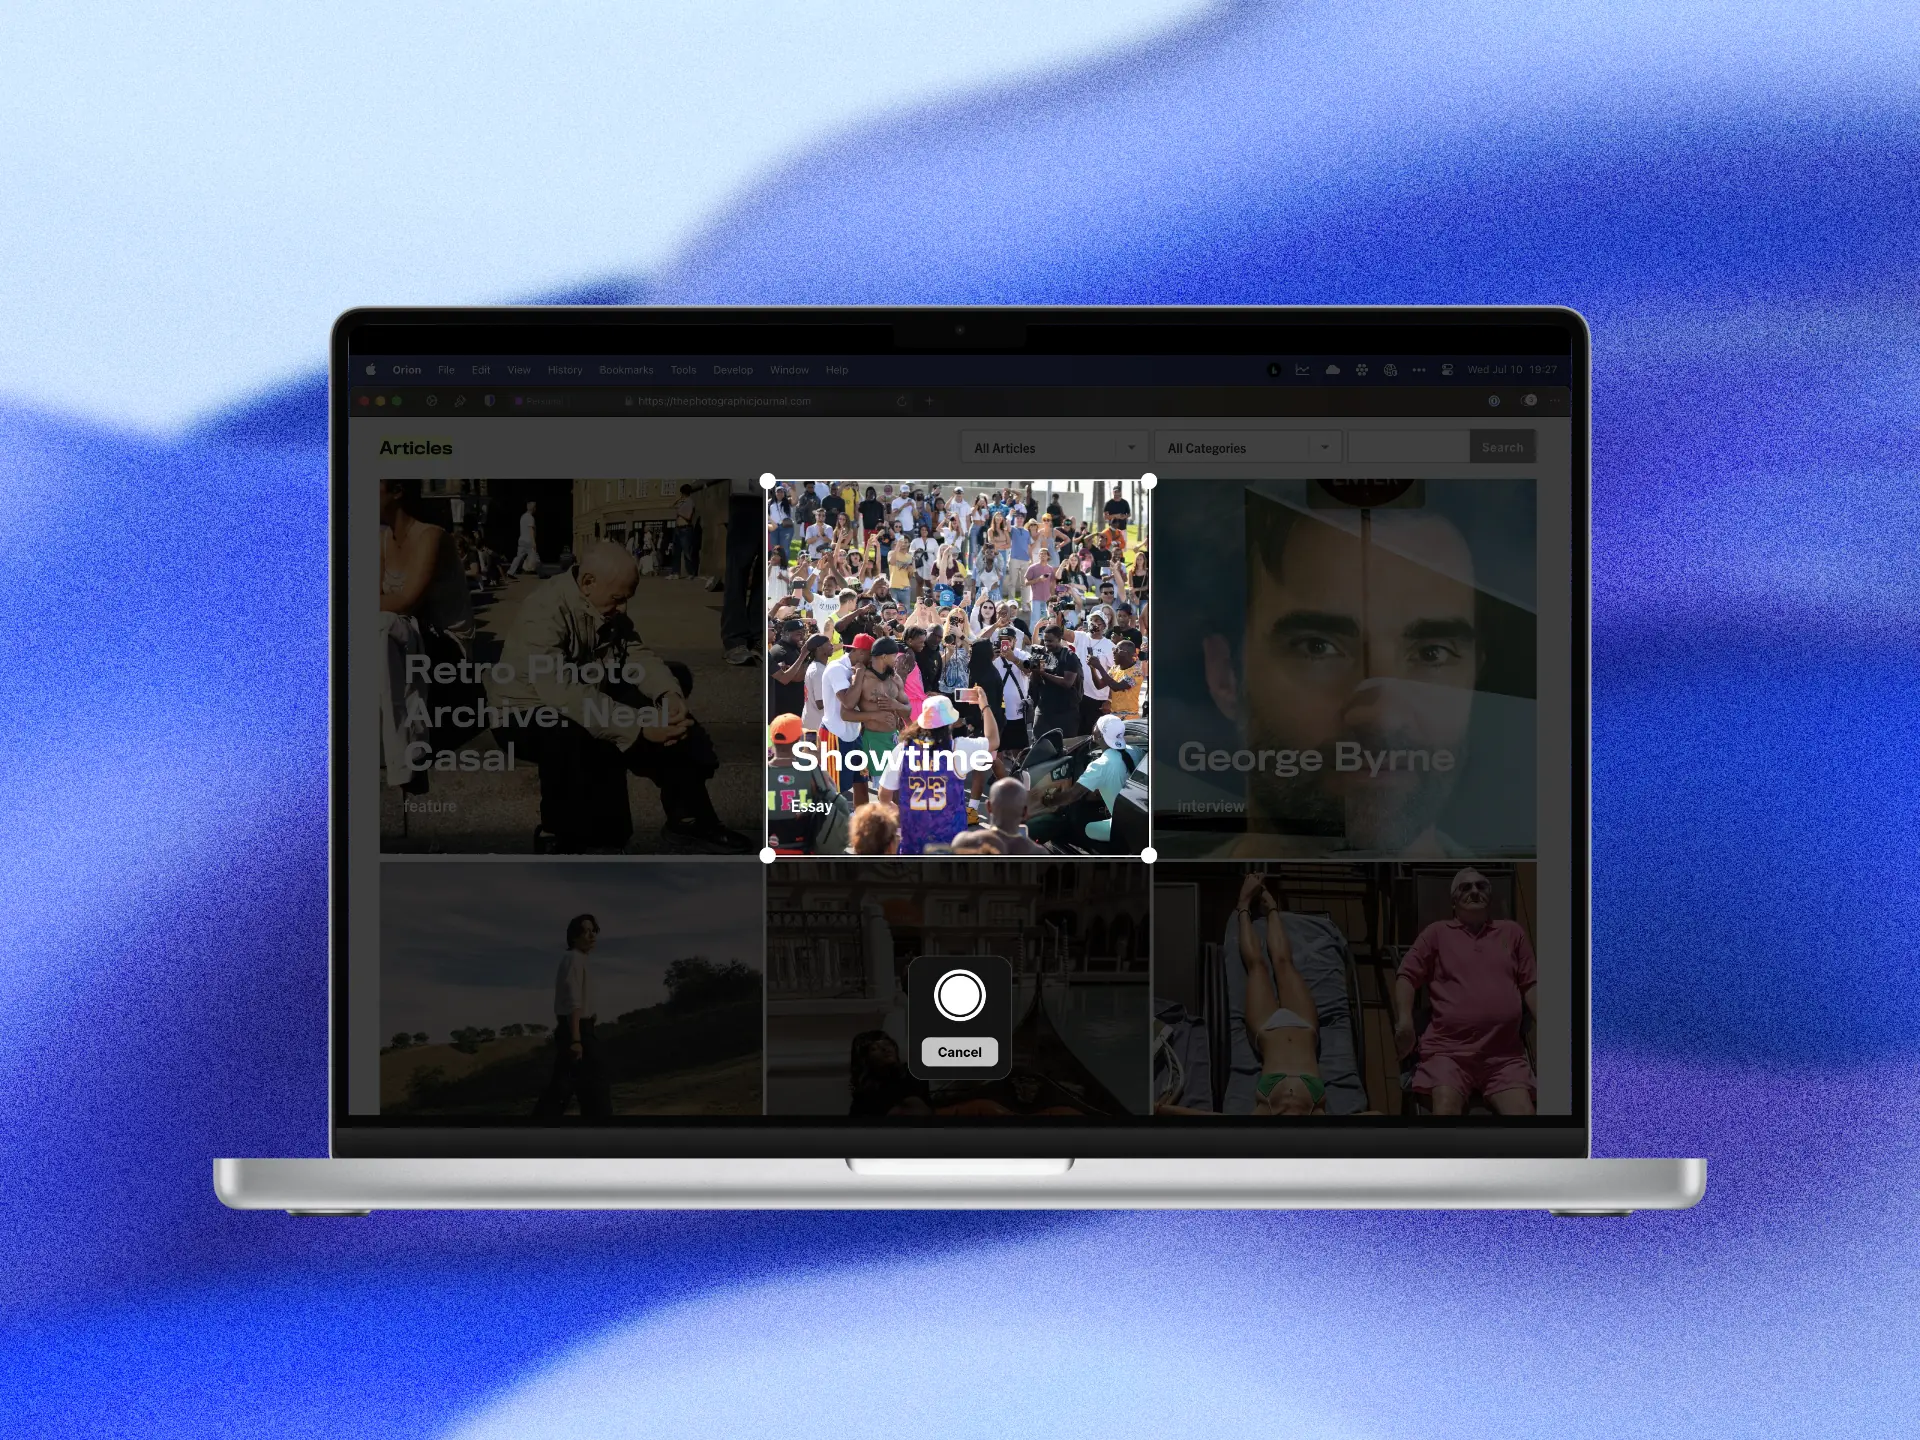
- Select the region of your screen you want to capture by clicking and dragging your cursor, or click the shutter button at the bottom of the screen to take a full-screen capture.
- After a second or two, the image link will be copied to your clipboard.
The keyboard shortcut only works outside of the Horizon Alpine for Desktop window. If the application you're currently using explicitly overrides this keyboard shortcut, it may not function in that application.
Alternatively, you may click the icon in the top right action menu within Horizon Alpine for Desktop. The application will automatically hide itself.
If selecting a region, the screenshot will be taken as soon as you release the mouse button.
To abort the capture, press the Escape key or the "Cancel" button at the bottom of the screen.
Horizon Alpine for Desktop will notify you when the upload is complete, and the link is ready to be pasted.
Sharing your Clipboard
For security and privacy reasons, Horizon Alpine for Desktop does not have a keyboard shortcut to share your clipboard. You must purposefully invoke the function and confirm your consent.
- If hidden, reveal the Horizon Alpine for Desktop window by clicking the icon in your system tray or top menu bar and selecting "Show/Hide".
- Click the icon in the top right action menu.
- Confirm the contents of your clipboard are safe to share.
- Configure the paste's preferences.
- Click "Upload Clipboard".
- After upload, the paste link will be copied to your clipboard and visible in the app.
Horizon Alpine for Desktop will never automatically share your clipboard. For your own safety, please review the contents of your clipboard in the displayd text box.
"View-Once" will make the paste only viewable once. After the paste is viewed, it will be immediately and permanently deleted.
"Encrypt" will encrypt the paste with an on-device securely generated key. The key will never be sent to Horizon, and only you and those you share the key with will be able to view the paste. In the final link, the key will be appended to the end of the URL as a fragment (text preceded by a hash symbol, e.g. https://bin.horizon.pics/identifier#key). Browsers will never send the fragment to the server, so the key will stay on-device at all times.
Configuring Settings
- If hidden, reveal the Horizon Alpine for Desktop window by clicking the icon in your system tray or top menu bar and selecting "Show/Hide".
- Click the icon in the top right action menu.
"Client-Side Compression" will automatically compress your screenshots before uploading them to Horizon. This can save bandwidth, storage space and time, but will reduce the quality of the image. This option is disabled by default.
Troubleshooting
The "Grant Permission" button doesn't work or my screenshots are black or blank.
Ensure that you have given Horizon Alpine for Desktop permission to view the contents of your screen. On macOS, open System Settings, Privacy & Security, Screen & System Audio Recording, and then enable the toggle next to "Horizon Alpine Desktop".
On Linux, you may need to run the application with the X11 window backend. Manually run the
program from the terminal by prepending the following text: GDK_BACKEND=x11 WAYLAND_DISPLAY="".

